Want to add a Widget House widget to your website? This guide explains how to install floating and static widgets on a selected page and how to show a floating widget across your entire site.
Before you begin, make sure you've created your widget and copied the installation code from your Widget House dashboard
Step-by-step guide to getting your Widget House widget code
Choose How You Want to Display the Widget
Add the widget to a single page
Log in to your website platform, content management system, hosting control panel, or open your website project in a code editor.
You need access to an HTML, Embed, Custom Code, or similar section that allows you to add the Widget House installation code.
Step 1: Open Your Website Editor or Project Files
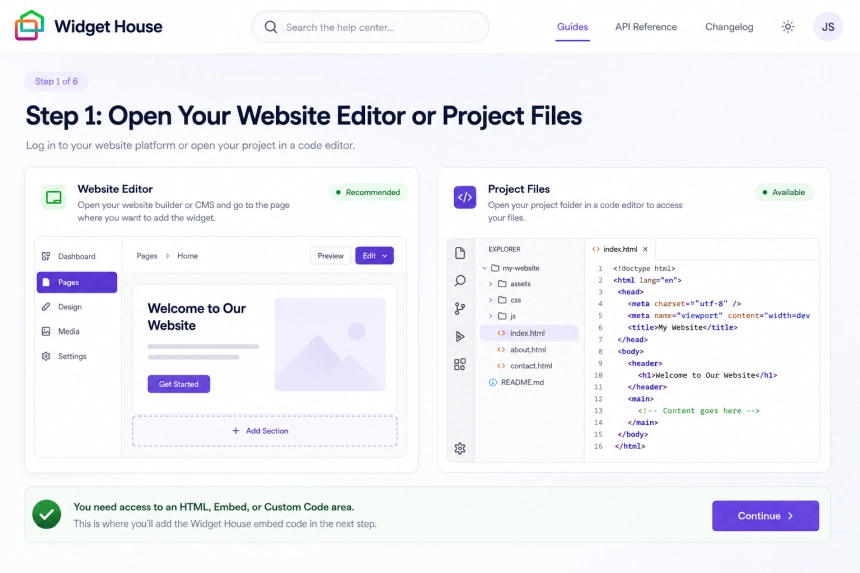
Open the page where you want the widget to appear. This may be your home page, product page, contact page, pricing page, or another page of your website.
If you are editing website files directly, open the corresponding HTML or template file in your code editor.
Step 2: Choose the Page for the Widget
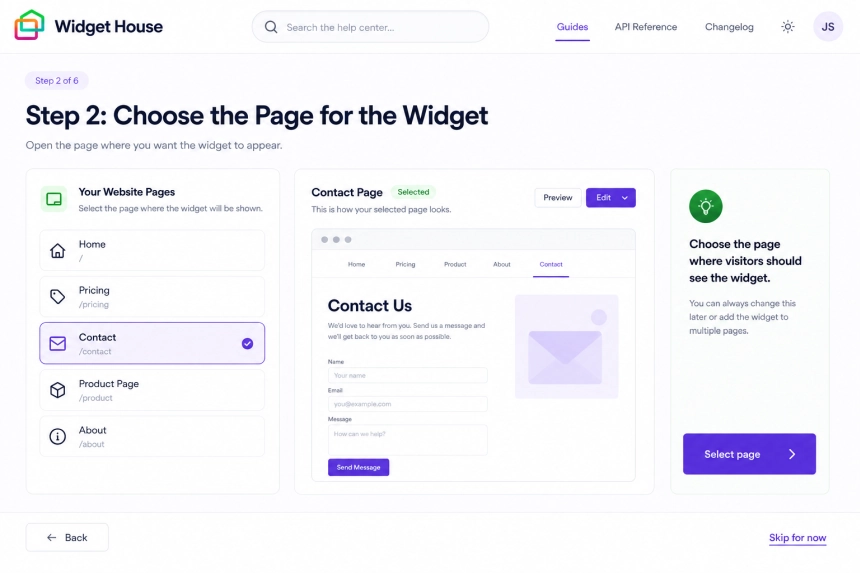
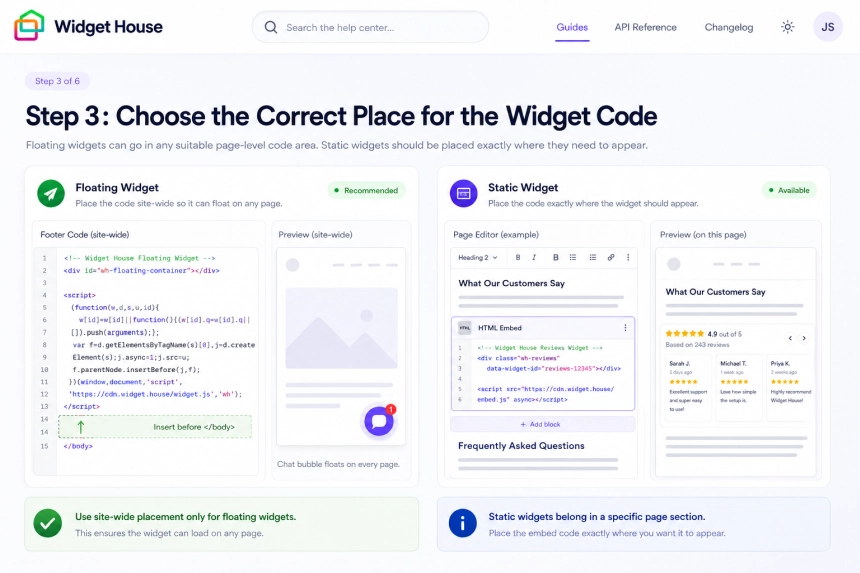
The correct placement depends on whether your widget is floating or static.
Floating widgets appear above the website content and usually stay in a fixed position on the screen. Their visible position is controlled by the widget settings, so the installation code can be added to any suitable page-level code area that supports scripts.
If you can edit the page HTML directly, we recommend placing the floating widget code before the closing </body> tag.
Static widgets are displayed directly inside the page content. Add the installation code to an HTML, Embed, or Custom Code block in the exact position where you want the widget to appear.
For example, you can place a static Google Reviews widget below a page heading, after a product description, above a contact form, or before the footer.
Step 3: Choose the Correct Place for the Widget Code
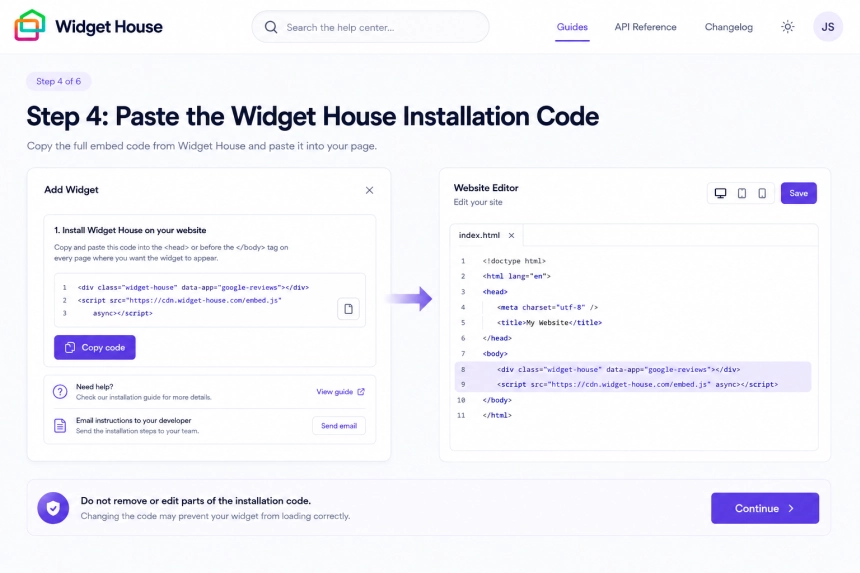
Copy the complete installation code from your Widget House dashboard.
For a floating widget, paste the code into the selected page-level code area or before the closing </body> tag.
For a static widget, paste the code into the HTML, Embed, or Custom Code block located exactly where the widget should be displayed.
Do not remove, split, or change any part of the installation code.
Step 4: Paste the Widget House Installation Code
Save, update, or publish the page, depending on your website platform.
If you are editing website files directly, save the updated file and upload or deploy it to your hosting server using your usual workflow.
Step 5: Save and Publish the Page
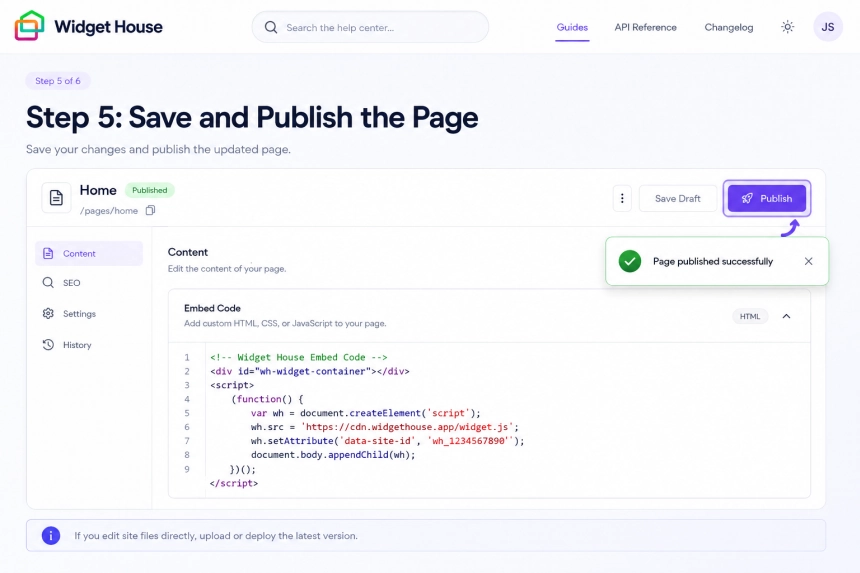
Open the published page in your browser and make sure the widget appears correctly.
For a static widget, check that it is displayed in the intended section of the page. For a floating widget, make sure it does not cover navigation, buttons, forms, or other important content.
We recommend checking the page on both desktop and mobile devices.
If the widget does not appear immediately, refresh the page, clear your browser cache, and make sure the latest version of the page has been published.
Step 6: Check the Widget on the Page

Show the widget on All pages
Add Your Widget to All Pages
Important: Site-wide installation is recommended only for floating widgets.
A floating widget can be added through a global code area because its visible position is controlled by the widget settings and does not depend on the exact location of the installation code.
We do not recommend using the all-pages installation method for static widgets. A static widget must be placed in a specific position inside the page content.
If a static widget is added through a global Header Code, Footer Code, shared layout, or site-wide Code Injection area, it may appear in the wrong place, display incorrectly, affect the page layout, or prevent some page elements from working as expected.
To display the same static widget on several pages, add it to the required position on each page or use a reusable section or page template that preserves its exact position.
Step 1: Check the Widget Display Type
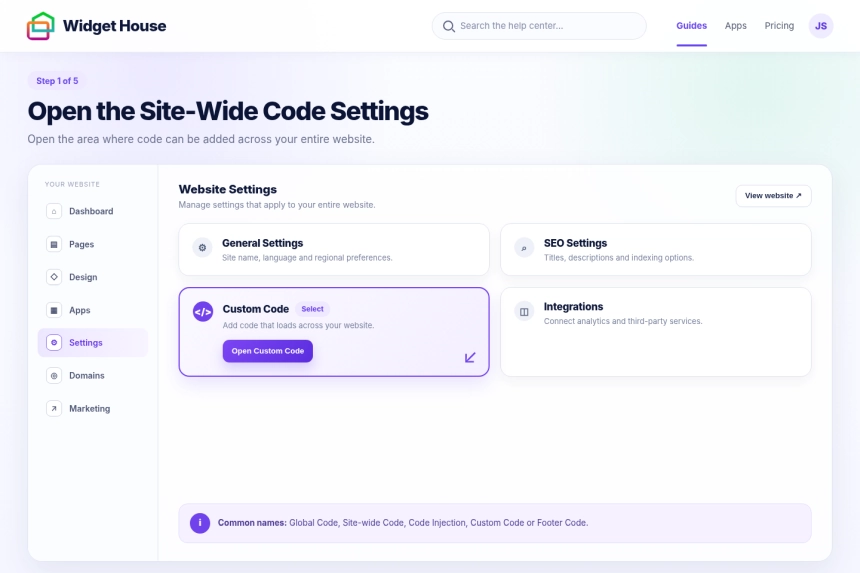
Log in to your website platform, hosting control panel, or website project and open the global website settings.
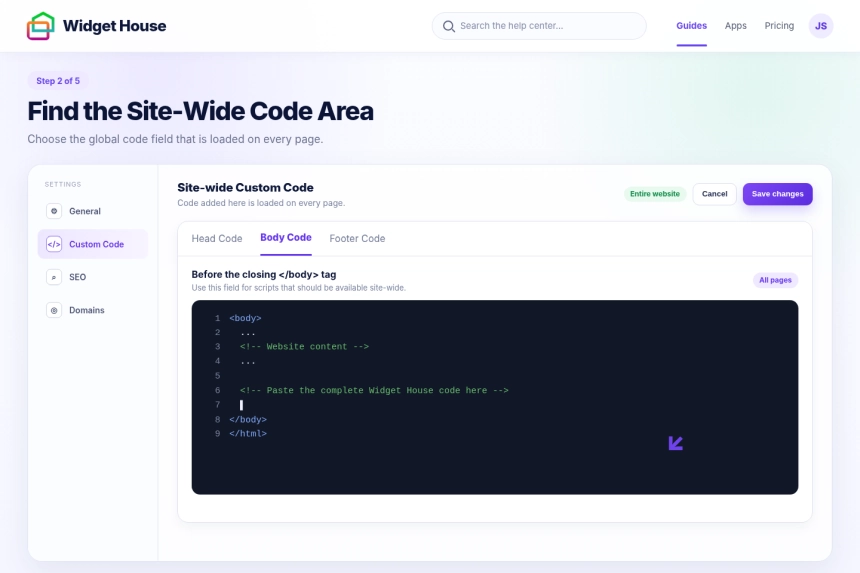
Look for a section called Site-Wide Custom Code, Global Code, Footer Code, Code Injection, Theme Template, Shared Layout, or a similar name.
If your website uses shared template files, open the layout or footer file that is loaded on every page.
Step 2: Open the Site-Wide Code Settings
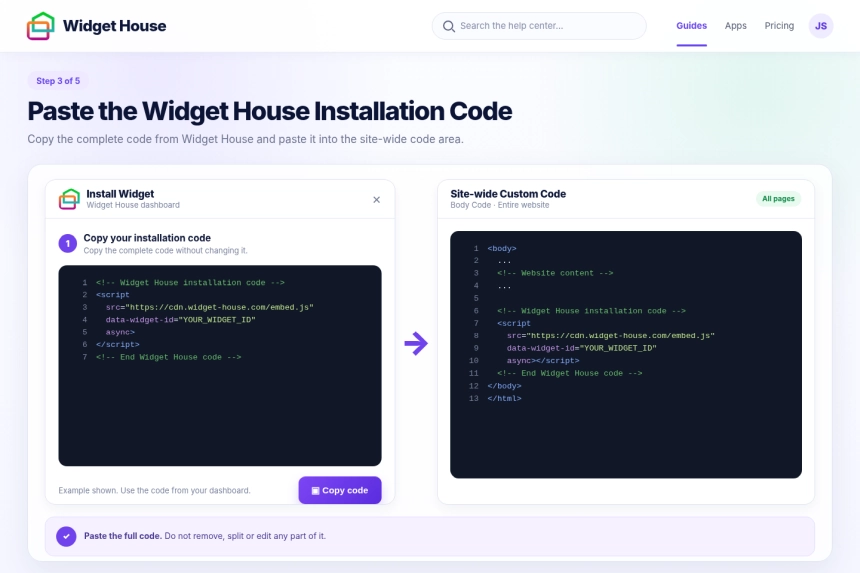
Copy the complete floating widget installation code from your Widget House dashboard.
Paste it into the site-wide code area. If you can edit the website template directly, we recommend placing the code before the closing </body> tag or at the bottom of the shared footer file.
You only need to add the code once. The floating widget will then load on every page that uses the shared layout.
Step 3: Paste the Full Widget House Installation Code
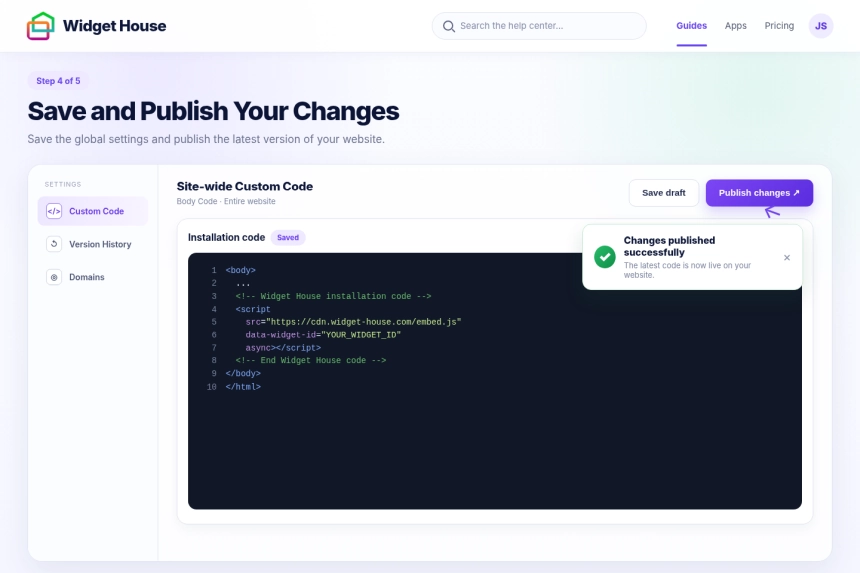
Save the updated global settings, layout, template, or footer file.
If your website has a build or deployment process, run your usual build command and publish the latest version.
If your website is managed through a visual editor, click Save, Update, or Publish.
Step 4: Save and Publish Your Changes
Open several pages of your website, such as the home page, product or service page, contact page, and another internal page.
The floating Widget House widget should now appear across your entire website.
Check its position and behavior on both desktop and mobile devices. Make sure it does not cover navigation, buttons, forms, cookie notices, or other important elements.
If the widget appears twice on any page, its code may have been added both globally and directly to that page. Remove one copy of the installation code.
Step 5: Check the Widget Across Your Website

All set. Your Widget House widget should now be working on your website.
Need a hand with setup?
Contact our support team at support@widget-house.com and we will help you get the widget running on your website.
support@widget-house.com