Want to display customer reviews from Google on a custom HTML website? This guide explains how to add the Widget House Google Reviews Widget to one selected page or display it across a multi-page website using a shared layout or template.
Before you begin, make sure you've created your widget and copied the installation code from your Widget House dashboard
Step-by-step guide to getting your Widget House widget code
Choose How You Want to Display the Widget
Add the widget to a single page
Note: This guide is for custom-coded HTML websites. If your website uses WordPress, Wix, Shopify, Webflow, Joomla, or another website builder, follow the corresponding platform-specific installation guide.
Open the folder where your HTML website files are stored. You can use a code editor such as Visual Studio Code, Sublime Text, or another editor you prefer.
If your website files are already online, you can also open them through your hosting file manager.
Open your Widget House dashboard and copy the complete installation code generated for your Google Reviews Widget.
The installation code contains a loading <script> and a <div> container with your unique widget ID. Keep both parts together and in the original order.
Before editing a live website, save a backup copy of the HTML file that you are going to change.
Step 1: Open Your Website Files and Copy the Widget Code
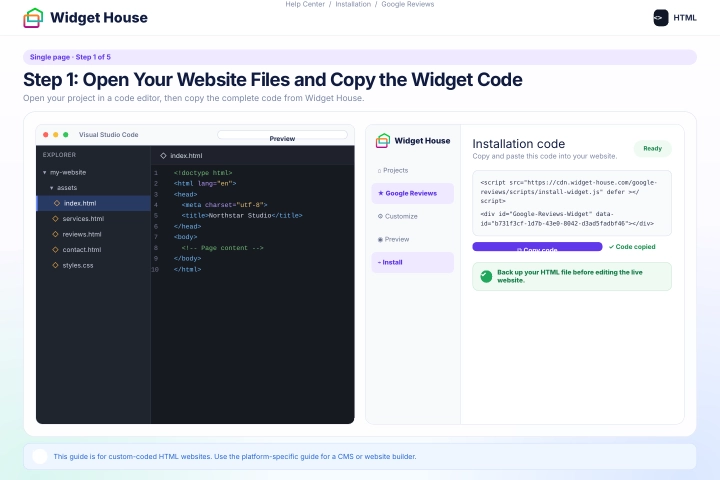
Find the HTML file for the page where you want the Google Reviews Widget to appear.
For example, this may be index.html, services.html, reviews.html, contact.html, or another page file.
Open the file in your code editor and locate the page's <body> section.
Do not add the complete static widget code inside the <head> section. The visible Google Reviews container must be placed inside the page body.
Step 2: Open the HTML File for the Required Page
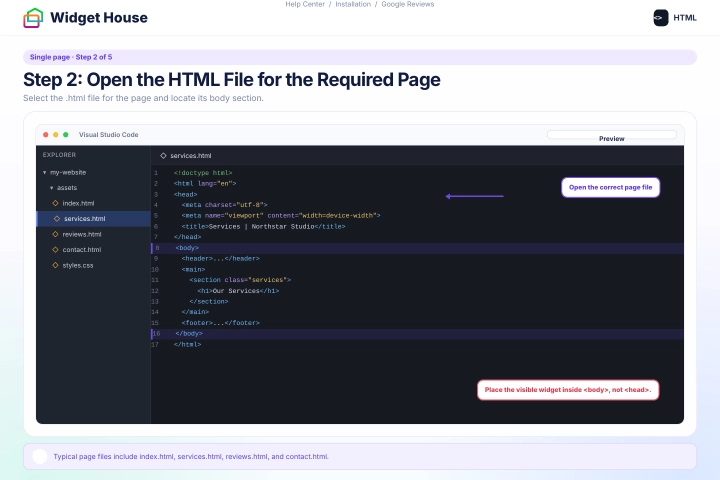
The Google Reviews Widget is static, which means it appears exactly where its installation code is placed in the HTML document.
Inside the <body> section, find the exact position where you want visitors to see the reviews.
For example, you can place the widget below a service description, above a contact form, before a call-to-action, inside a testimonials section, or near the bottom of the page.
Insert the installation code between complete HTML elements. Do not paste it inside an opening tag, paragraph, link, image, list, form, or another <script> element.
A full-width section or container is usually the best choice for a Google Reviews carousel, slider, or grid.
Step 3: Choose the Exact Position for the Widget
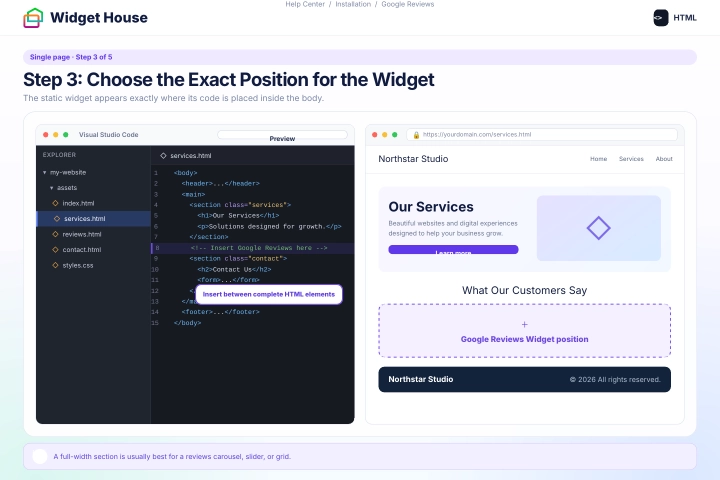
Paste the complete Google Reviews Widget installation code from your Widget House dashboard into the selected position.
Keep the loading <script> and the Google Reviews <div> container together and in the original order.
Do not remove, split, rename, or change any part of the installation code.
Do not wrap the code in additional <pre>, <code>, or <iframe> tags.
The code shown in the screenshots is an example. Always copy the installation code from your own Widget House dashboard so the correct reviews, settings, and design are displayed.
Step 4: Paste the Google Reviews Widget Code
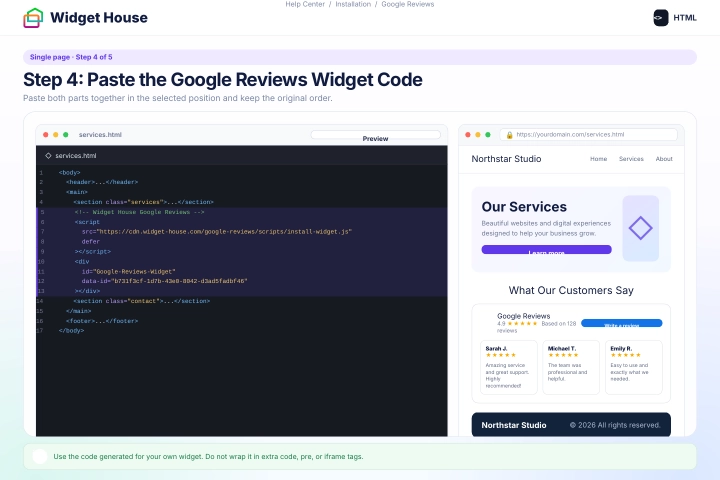
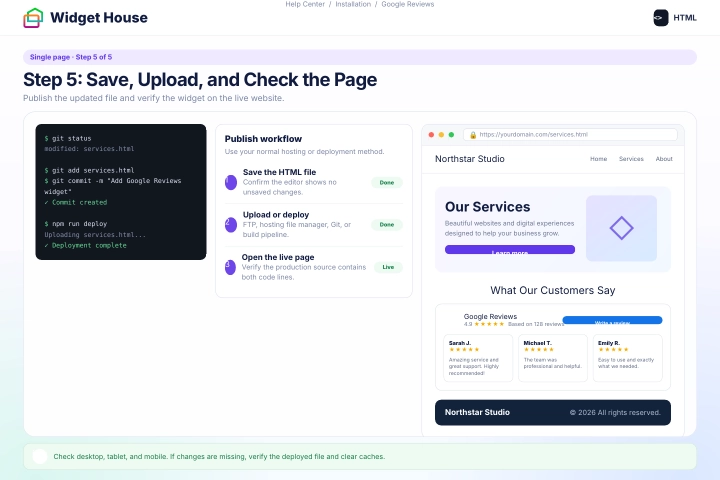
Save the updated HTML file.
If you edited the file locally, upload it to your hosting server using your usual workflow, such as a hosting file manager, FTP, Git deployment, or another publishing method.
If your website uses a build or deployment process, run the required build command and publish the latest version.
Open the live page in a new browser tab and make sure the Google Reviews Widget appears in the selected position.
Check the page on desktop, tablet, and mobile devices. Make sure the widget is fully visible and does not overlap text, navigation, buttons, forms, or other content.
If the widget does not appear, confirm that the updated file was uploaded to the correct location and that both the <script> and <div> are present in the published HTML source.
You may also need to refresh the page, open it in a private browser window, or clear your browser, website, server, or CDN cache.
Step 5: Save, Upload, and Check the Page
Show the widget on All pages
Show It on All Pages of Your Website
Quick check: If your website uses a shared layout, template, component, or footer, add the widget code there once. If every page is a separate HTML file, add the code to each page where the widget should appear.
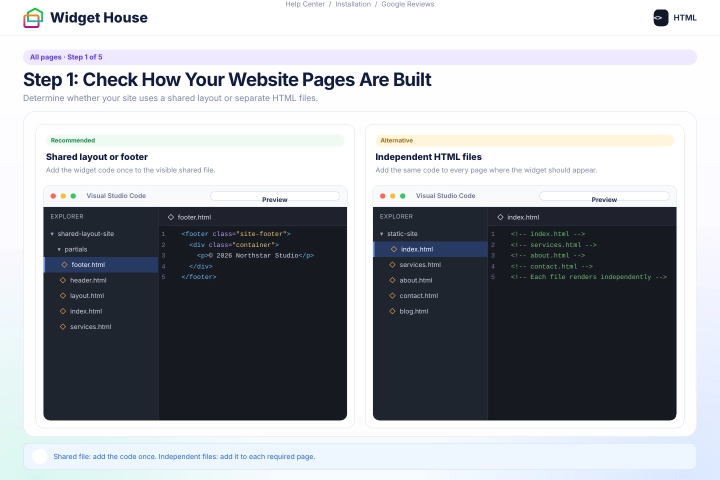
Determine whether your website uses a shared file that is included on multiple pages.
Depending on how your website is built, this may be a file such as layout.html, base.html, footer.html, main.php, or another shared template or partial.
Static site generators and server-side template systems may use a shared layout that is processed during the build or rendering process.
If every page is an independent HTML file and your project has no shared layout, you will need to add the Widget House installation code separately to every page where the widget should appear.
Step 1: Check How Your Website Pages Are Built
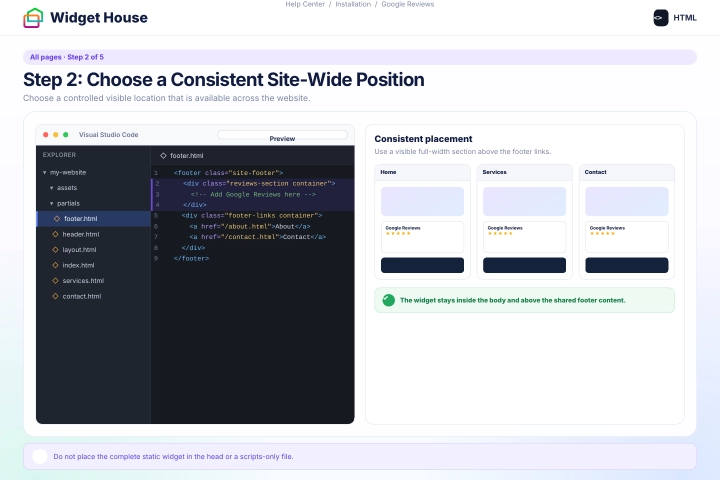
Because the Google Reviews Widget is static, choose a visible and controlled position that is available across your website.
A full-width section above the main footer is usually a suitable location for displaying reviews consistently on multiple pages.
If your website uses a shared footer, layout, or template file, locate the part of that file that is rendered inside the page's <body>.
Do not place the complete widget code in a scripts-only file, inside the <head>, or directly before the closing </body> tag unless that location corresponds to the visible section where you want the reviews to appear.
Use the same relative position on every page or template so the widget appears consistently throughout the website.
Step 2: Choose a Consistent Site-Wide Position
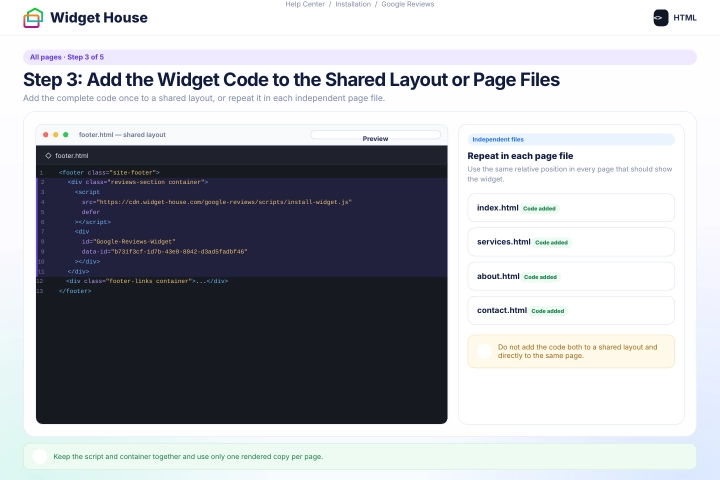
If your website uses a shared layout, paste the complete Google Reviews Widget installation code into the selected visible position in that layout, template, component, or partial.
If your pages are separate HTML files, paste the same installation code into the corresponding position in every file where you want the widget to appear.
Keep the loading <script> and the Google Reviews <div> container together and in the original order.
Do not edit the script URL, widget ID, container ID, or any other part of the installation code.
Add only one copy of the code to each rendered page. Do not place it both in a shared layout and directly in an individual HTML file, because the widget may appear twice.
The code shown in the screenshots is an example. Use the installation code generated for your own widget before publishing the website.
Step 3: Add the Widget Code to the Shared Layout or Page Files
Save every updated HTML, layout, template, component, or partial file.
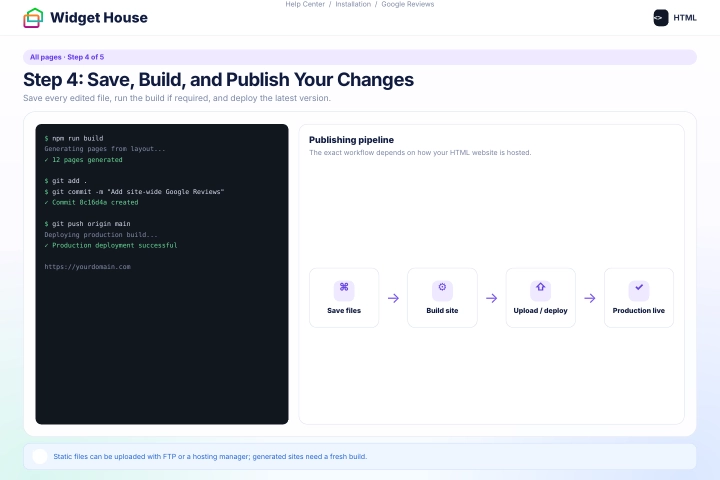
If your website uses a build system or static site generator, run the usual build process so the shared layout changes are applied to the generated pages.
If your website consists of individual static files, upload all updated HTML files to your hosting server.
If you use Git-based deployment, commit the changes and deploy the latest version through your normal workflow.
Make sure the production website is using the files or build version that contains the new Widget House code.
Step 4: Save, Build, and Publish Your Changes
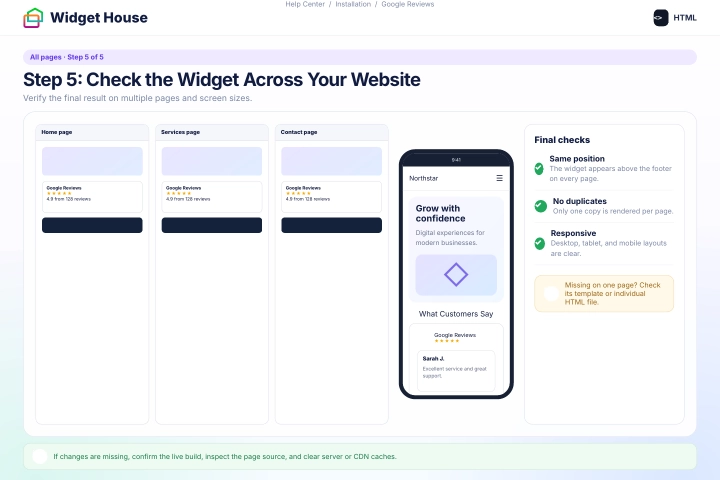
Open several live pages, such as the home page, contact page, product or service page, and another internal page.
The Google Reviews Widget should appear in the same intended position on every page that contains the installation code or uses the updated shared layout.
Check the widget on desktop, tablet, and mobile devices. Make sure it is fully visible and does not overlap navigation, forms, buttons, footer links, or other content.
If the widget is missing from one page, confirm that the page uses the updated shared template or that its individual HTML file contains the complete installation code.
If the widget appears twice, check whether the code was added both to a shared layout and directly to the page. Remove the duplicate copy.
If the latest changes are not visible, confirm that the website was rebuilt or uploaded successfully, then clear your browser, server, and CDN caches if applicable.
Step 5: Check the Widget Across Your Website
All set. Your Google Reviews Widget should now be working on your HTML website.
Need a hand with setup?
Contact our support team at support@widget-house.com and we will help you get the widget running on your HTML website.
support@widget-house.com